We recently came across an application that uses Graph API and we wanted to start using it for some our on-prem mailboxes. Hybrid Graph API only supports delegated authentication flows and not application authentication flows. Just because something isn’t “supported” doesn’t mean you can’t make it work! There are two things that we’ll need to do to make this work.
First, any internet-facing Exchange server will need to have ‘V1S2SAppOnly‘ OAuth support added. You can do this by adding V1S2SAppOnly to the OAuthHttpModule.Profiles key in the REST web.config (ex. …\Program Files\Microsoft\Exchange Server\V15\FrontEnd\HttpProxy\rest). Once you add this value the key should look like this:

After this has been added either perform an iisreset or restart the ‘MSExchangeRestFrontEndAppPool‘ app pool in IIS for each server where you did this modification.
The next step is to add the appropriate ‘AppOnlyPermissions‘ to the Microsoft Graph partner application in Exchange/AD. First we’ll take a look at our Graph partner application:
Get-PartnerApplication | Where {$_.Name -like '*graph*'} | select *permissions* | fl

AppOnlyPermissions :
ActAsPermissions   : {Mail.Read, Mail.Write, Mail.Send, Calendars.Read...}
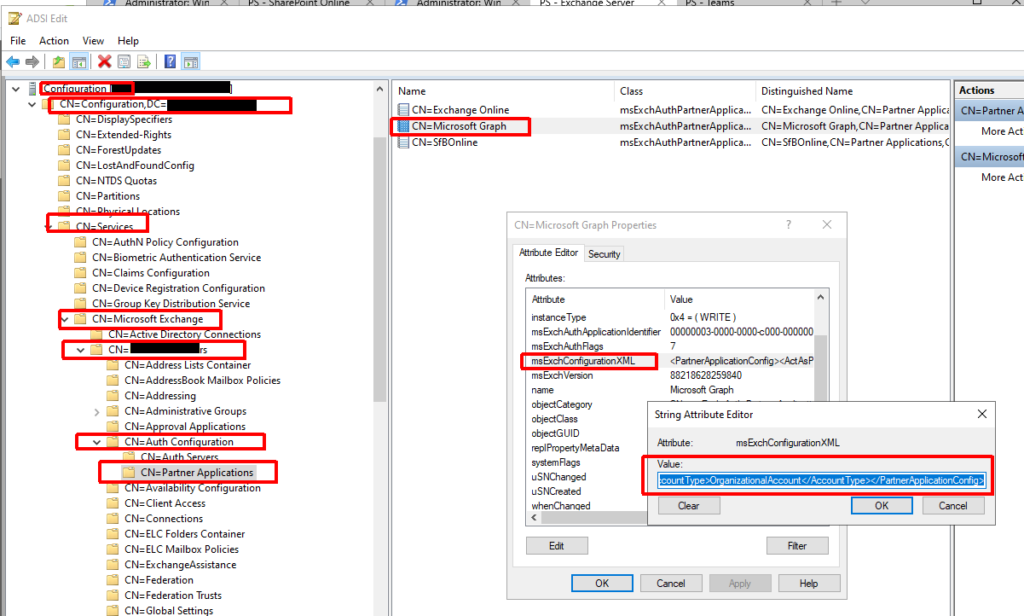
The ‘AppOnlyPermissions‘ value should be blank. We need this to match the ‘ActAsPermissions‘ value. You’d think (and some other articles say) that you could just run Set-PartnerApplication -AppOnlyPermissions… but this was not a supported parameter for me. To set this we’ll have to edit AD directly. You’ll need to fire up something like ADSIEdit, load the AD configuration partition, and drill down to your Exchange org and partner application object. The path should be something like:
CN=Microsoft Graph,CN=Partner Applications,CN=Auth Configuration,CN=YOUR_EXCH_ORG,CN=Microsoft Exchange,CN=Services,CN=Configuration,DC=domain,DC=com
Once here you’ll need to open the ‘Microsoft Graph‘ object and copy the ‘msExchConfigurationXML‘ attribute value to the clipboard:

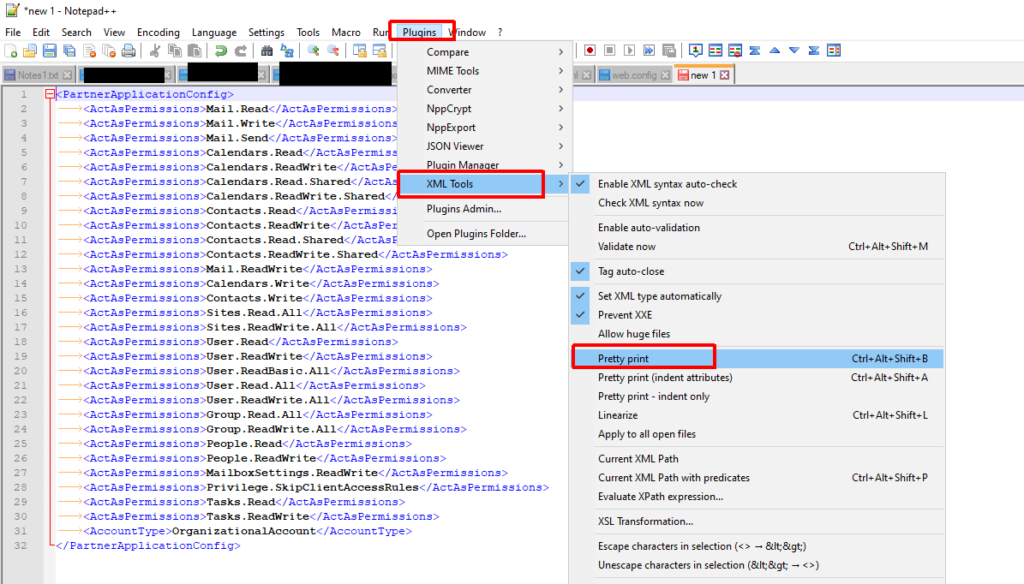
Next, we’ll use Notepad++ and the XML Tools plugin to manipulate this. MAKE SURE YOU BACKUP THIS VALUE. We want to convert this to a nicely formatted XML output so that it is easy to work with. To do this we use the ‘Pretty print’ option in XML Tools.

Once we have this we’ll need to duplicate all of the ‘ActAsPermissions’ lines and then use find and replace to convert those tags to be ‘AppOnlyPermissions’. Doing this will create a set of application permissions based on our delegated permissions (ActAsPermissions).

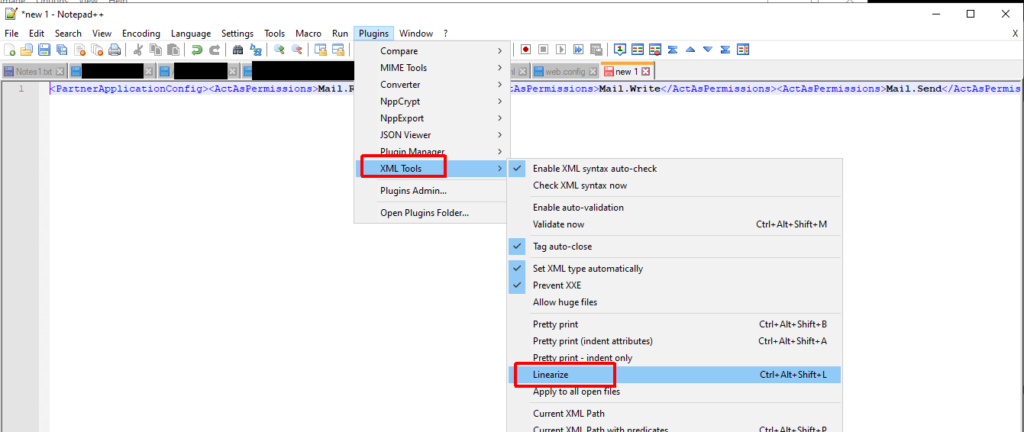
Once completed we need to linearize the output again so that we can copy it back into AD. We can use the ‘Linearize’ option in XML Tools for this:

Once we have the XML in the proper format we can put it back in the AD object:

Now that we’ve updated the AD object we can verify everything looks good by checking Exchange again (AppOnlyPermissions should have the same values as ActAsPermissions):
Get-PartnerApplication | Where {$_.Name -like '*graph*'} | select *permissions* | fl


AppOnlyPermissions : {Mail.Read, Mail.Write, Mail.Send, Calendars.Read...}
ActAsPermissions   : {Mail.Read, Mail.Write, Mail.Send, Calendars.Read...}
At this point you should be able to access on-prem Exchange resources using the supported Graph API functions with Application Permissions.
NOTE: One limitation of this is that application access policies (set in EXO) DO NOT apply and are ignored when accessing an on-prem mailbox.