UPDATE (11/2/22): I just noticed a parameter in OWA policies in EXO PowerShell the other day that allows you to set the default domain for Bookings calendars. I was able to set the default domain to bookings.company.com and it is taking effect for all newly created Bookings calendars. You need to run this for all OWA mailbox policies that apply to users who have access to create calendars. The command I used was:
During testing of Microsoft Bookings we found there was no way to adjust the sender email address for a Bookings company. This was frustrating as our default address was our default tenant address (which ended in onmicrosoft.com). This led me to ask how does this system even work? What is generating the emails? What hosts the email address?
Let’s start by looking for the object(s) hosting this service from an email perspective. To do this we can issue the command below in an Exchange Online PowerShell session. For each ‘company’ created in Bookings there is an associated mailbox created with the ‘RecipientTypeDetails‘ of ‘SchedulingMailbox‘. These mailboxes are not visible in the Exchange Online admin console.
When the company is created, the user(s) with permissions to manage are added with ‘FullAccess‘ to the mailbox permissions. This is how Bookings company permissions are managed.
The mailbox is also configured to forward to the email address configured under ‘Business Information’ -> ‘Send customer replies to’.
There is also a Azure AD user account created for each company.
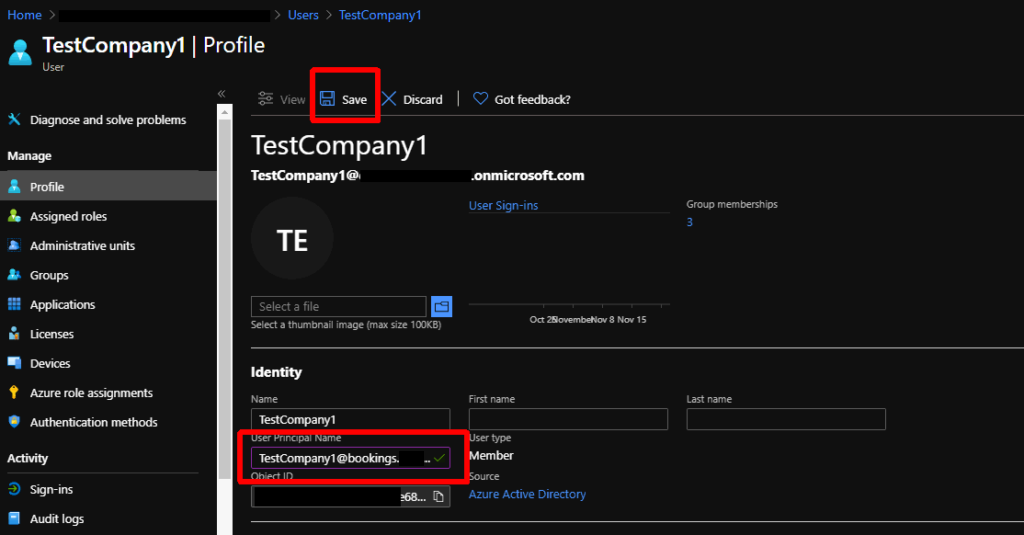
Now that we have the new sub-domain we can use this in our Bookings company mailbox. The easiest way to do this is to adjust the UPN of the user account associated with the mailbox. This will automatically update the address.
After the Exchange Online directory syncs up with Azure AD the email address should be updated.
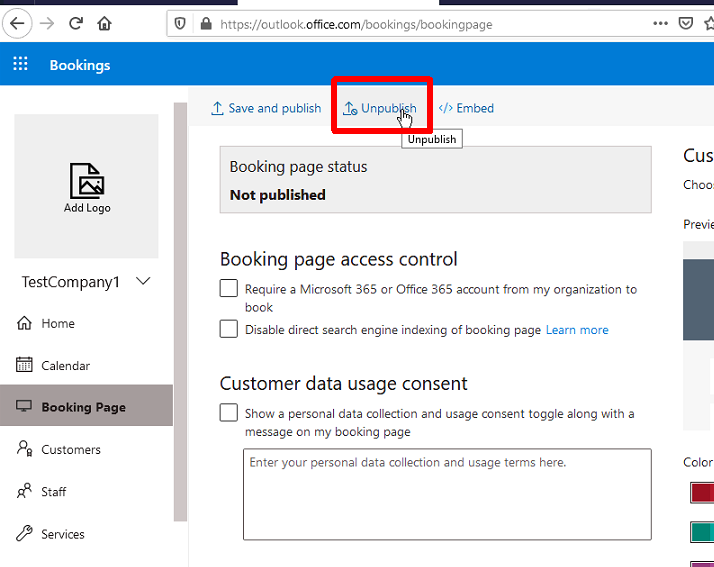
Now we need to unpublish and re-publish the company booking page so that it starts using the new address.
After re-publishing the page we need to wait a little bit for it to pick up the new email address. Eventually Bookings will start sending emails from the new email address. In testing it took around 10-15 minutes to take effect.
One more thing to note is that Bookings does not give you a method to delete companies after creating them. If you ever need to delete the company you simply need to delete the mailbox/user using the Remove-Mailbox cmdlet.
After implementing Teams last year we were faced with a number of issues to work through. One of the issues we were having was the inability of mailbox delegates to schedule meetings on behalf of mailbox owners. If you are a hybrid Exchange user, the very first step is making sure you have OAuth configured between your on-premises environment and Exchange online. The Hybrid Configuration Wizard should be taking care of this for you. I’ve also written an article on properly securing it externally. You will also need create and configure a service principal to allow Teams to interact with your on-premises Exchange environment. Steps 2-3 in this article must be preformed to set this up. If one of these items are not configured, you will receive the error ‘Sorry, but we can’t connect to the server right now. Please try again later.‘
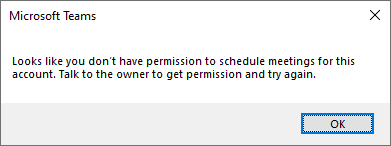
Once these pre-requisites are configured, you may find users are still receiving errors when trying to schedule Teams meetings on behalf of other users. An error that many of our users were experiencing was ‘Looks like you don’t have permission to schedule meetings for this account. Talk to the owner to get permission and try again.‘
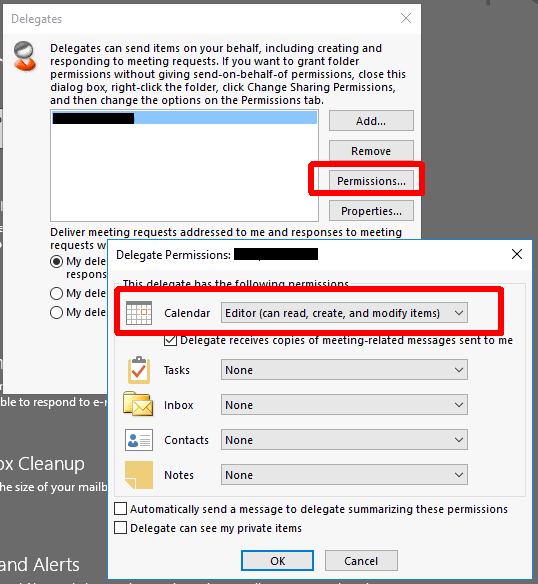
During testing we found that Teams was looking for a specific set of permissions on the owner’s mailbox when generating the Teams meeting in Outlook. In order to create a meeting as a delegate, the delegate must be a true ‘delegate’ under the owner’s mailbox AND have either ‘Author‘ or ‘Editor‘ access to the calendar like the example below. If the user is not present in this list or if they are present but show a calendar permission such as ‘Custom‘ in this dialog, they will receive an error like the one above when creating the Teams portion of the meeting even if they technically have all the required permissions to create a meeting on behalf of the organizer. Many times permissions are granted either by giving full access (Add-MailboxPermission) to the mailbox or by granting folder level permissions (Add-MailboxFolderPermission) and by granting Send-On-Behalf/SendAs permissions.
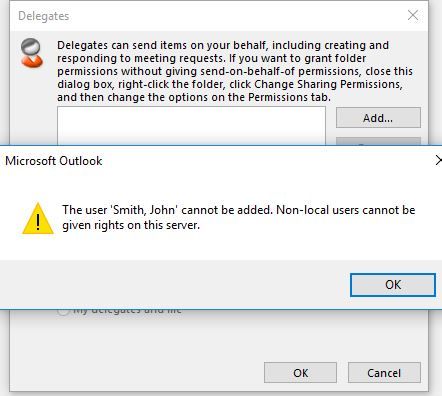
NOTE: If you are getting the error like the one below: ‘The user ‘Smith, John’ cannot be added. Non-local users cannot be given rights on this server‘ when trying to add an EXO user as a delegate to an on-prem mailbox you need to make the mailbox ACLable per this KB: A remote mailbox created in on-premises AD DS is not ACLable in Exchange Online.
Error encountered when adding an EXO user as a delegate to an on-prem mailbox
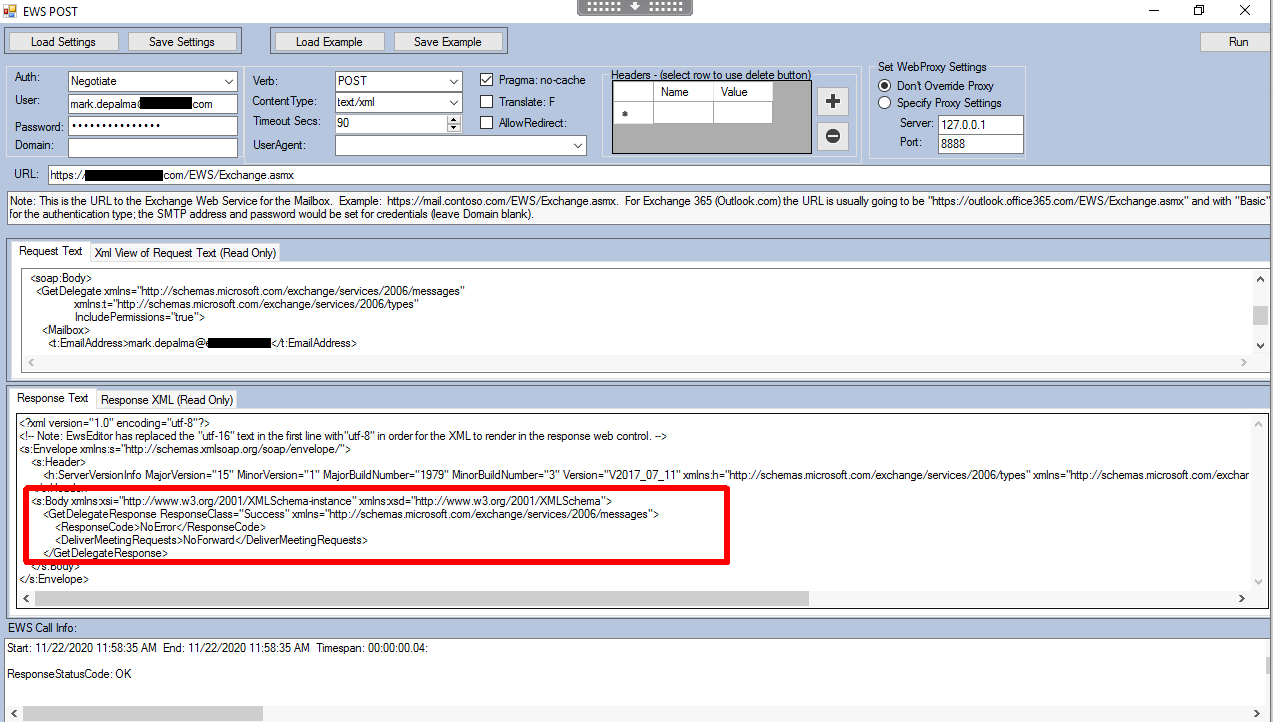
To understand why Teams requires such a specific configuration, let’s look at what is happening in the background… When you are creating a new Teams meeting via Outlook, the Teams back-end actually does a OAuth-authenticated EWS (Exchange Web Services) ‘GetDelegate‘ call to your on-premises Exchange environment to verify that the user creating the meeting actually has access to the mailbox. The request look like this:
Exchange will respond with delegate list and associated permissions (similar to the view you see in Outlook).
<?xml version="1.0" encoding="utf-8"?>
<!-- Note: EwsEditor has replaced the "utf-16" text in the first line with"utf-8" in order for the XML to render in the response web control. -->
<s:Envelope xmlns:s="http://schemas.xmlsoap.org/soap/envelope/">
    <s:Header>
        <h:ServerVersionInfo MajorVersion="15" MinorVersion="1" MajorBuildNumber="1979" MinorBuildNumber="3" Version="V2017_07_11" xmlns:h="http://schemas.microsoft.com/exchange/services/2006/types" xmlns="http://schemas.microsoft.com/exchange/services/2006/types" xmlns:xsd="http://www.w3.org/2001/XMLSchema" xmlns:xsi="http://www.w3.org/2001/XMLSchema-instance" />
    </s:Header>
    <s:Body xmlns:xsi="http://www.w3.org/2001/XMLSchema-instance" xmlns:xsd="http://www.w3.org/2001/XMLSchema">
        <GetDelegateResponse ResponseClass="Success" xmlns="http://schemas.microsoft.com/exchange/services/2006/messages">
            <ResponseCode>NoError</ResponseCode>
            <ResponseMessages>
                <DelegateUserResponseMessageType ResponseClass="Success">
                    <ResponseCode>NoError</ResponseCode>
                    <DelegateUser>
                        <UserId xmlns="http://schemas.microsoft.com/exchange/services/2006/types">
                            <SID>S-1-5-21-2061111111-1111111111-222222222-33333</SID>
                            <PrimarySmtpAddress>delegateuser@domain.com</PrimarySmtpAddress>
                            <DisplayName>User, Delegate</DisplayName>
                        </UserId>
                        <DelegatePermissions xmlns="http://schemas.microsoft.com/exchange/services/2006/types">
                            <CalendarFolderPermissionLevel>Editor</CalendarFolderPermissionLevel>
                            <TasksFolderPermissionLevel>None</TasksFolderPermissionLevel>
                            <InboxFolderPermissionLevel>None</InboxFolderPermissionLevel>
                            <ContactsFolderPermissionLevel>None</ContactsFolderPermissionLevel>
                            <NotesFolderPermissionLevel>None</NotesFolderPermissionLevel>
                        </DelegatePermissions>
                        <ReceiveCopiesOfMeetingMessages xmlns="http://schemas.microsoft.com/exchange/services/2006/types">false</ReceiveCopiesOfMeetingMessages>
                        <ViewPrivateItems xmlns="http://schemas.microsoft.com/exchange/services/2006/types">false</ViewPrivateItems>
                    </DelegateUser>
                </DelegateUserResponseMessageType>
            </ResponseMessages>
            <DeliverMeetingRequests>NoForward</DeliverMeetingRequests>
        </GetDelegateResponse>
    </s:Body>
</s:Envelope>
The important things here are that the user is present and has either ‘Author‘ or ‘Editor‘ permissions to the calendar. Remember, even having ‘Custom‘ permissions to the calendar will result in an error during meeting creation.
Another issue you can run into is one where you have already added the user as a delegate with the appropriate calendar permissions, but still receive the error ‘Looks like you don’t have permission to schedule meetings for this account. Talk to the owner to get permission and try again.‘ To troubleshoot this, let’s look at the mailbox from the perspective of Teams and perform the EWS ‘GetDelegate‘ call ourselves. We can use EwsEditor to do this.
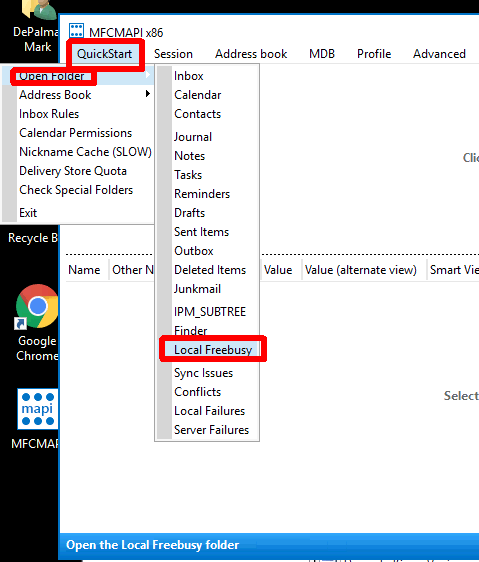
In this example we receive an empty response from EWS even though we have properly configured the delegate permissions. This is indicative of mailbox corruption and to resolve this we have to understand how delegates are actually stored in the mailbox. Delegates actually translate to a number of things, but at the center of all of this is the ‘LocalFreebusy‘ object in the mailbox which can only be viewed with a tool like MFCMapi. The reason EWS is returning a blank list is because the object in the mailbox is corrupt and missing the delegate information. In order to resolve this we will use MFCMapi to delete the object. You can perform this on behalf of the user if you have full mailbox permissions and write access to their AD account, but in this example we will run as the mailbox owner using their default MAPI profile. To reset/repair the delegates list we will perform the following steps:
Before anything, record all of the users delegates from Outlook along with all the permissions for each one
Go to QuickStart -> Open Folder -> Local Freebusy
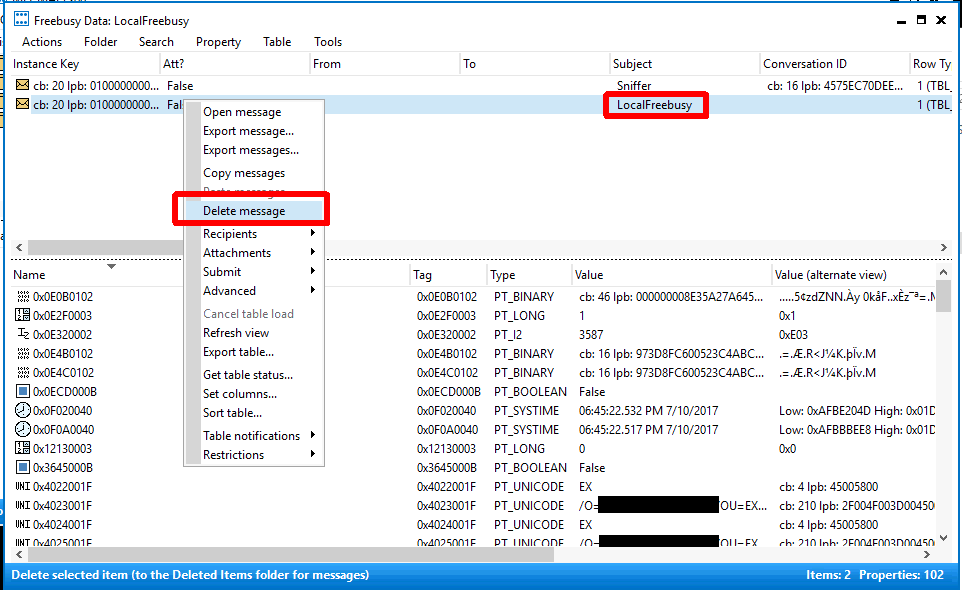
Choose the item with the subject ‘LocalFreebusy‘
Choose ‘Delete message‘ and when prompted with options choose ‘Permanent delete passing DELETE_HARD_DELETE…’
Go back into Outlook and re-create the user’s delegate(s)
After recreating the user’s delegates we can issue the EWS call again and see if they now show properly. The response should contain every delegate user along with their ‘Author‘ or ‘Editor‘ calendar permissions. Once you have verified EWS is returning the correct information you can try creating a new Teams meeting request.